- Using Interface we can have blue print of list of things which needs to be implemented
interface calculateInterest {
    accountType: String,
    interest: number,
    depAmt?: number,
    calculateInt(depositAmt: number) : number;
}

var IntForSavings: calculateInterest = {
    accountType: "Savings",
    interest: 12,
    depAmt : 0,
    calculateInt: function (depositAmt:number) {
        this.depAmt = depositAmt;
        return depositAmt * this.interest;
    }
};

var IntForCurrent: calculateInterest = {
    accountType: "Current",
    interest: 5,
    depAmt: 0,
    calculateInt: function (depositAmt: number) {
        this.depAmt = depositAmt;
        return depositAmt * this.interest;
    }
};

var IntForLoans: calculateInterest = {
    accountType: "Loan Account",
    interest: 8,
    depAmt: 0,
    calculateInt: function (depositAmt: number) {
        this.depAmt = depositAmt;
        return depositAmt * this.interest;
    }
};

console.log(IntForSavings.accountType + ' yields ' + IntForSavings.calculateInt(12000) + ' for cash amount of ' + IntForSavings.depAmt);
console.log(IntForCurrent.accountType + ' yields ' + IntForCurrent.calculateInt(6000) + ' for cash amount of ' + IntForCurrent.depAmt);
console.log(IntForLoans.accountType + ' yields ' + IntForLoans.calculateInt(3000) + ' for cash amount of ' + IntForLoans.depAmt);
Output
Savings yields 144000 for cash amount of 12000
Current yields 30000 for cash amount of 6000
Loan Account yields 24000 for cash amount of 3000
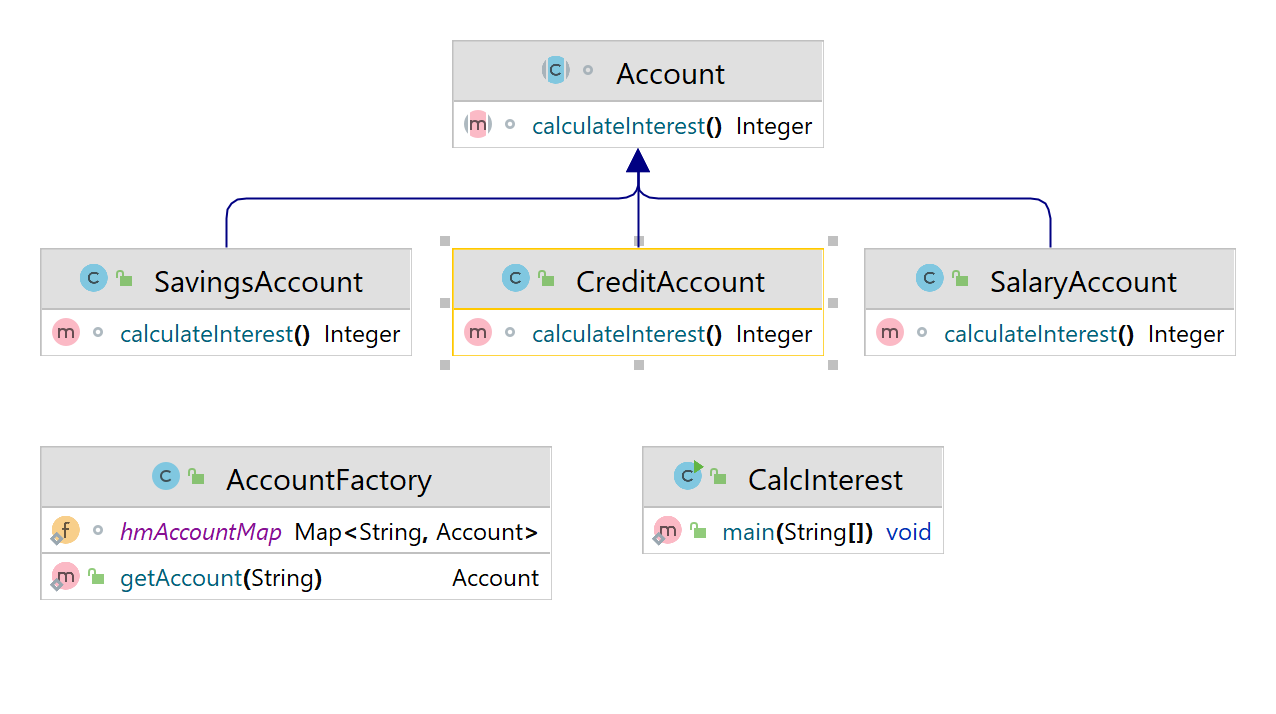
Accounts.ts
interface Accounts {
    accountType?: string;
    calculateInterest(accountType: string): number;
}

class SavingsAcc implements Accounts {

    minimumBalance: number = 10000;
    accountType: string = 'Savings';

    calculateInterest(accountType: string): number{
        return 5;
    }
}

class CurrentAcc implements Accounts {
    minimumBalance: number;
    accountType: string = 'Current';
    calculateInterest(accountType: string): number {
        return 5;
    }
}

class LoanAcc implements Accounts {
    accountType: string = 'Loan';
    calculateInterest(accountType: string): number {
        return 12;
    }
}

class Customer {
    private _accountType: Accounts;

    constructor(customerId: number, AccountType : Accounts) {
        this._accountType = AccountType;
    }

    public get accountType(): Accounts {
        return this._accountType;
    }
    public set accountType(value: Accounts) {
        this._accountType = value;
    }
}

window.onload = function () {
    var objCustomer: Customer = new Customer(1001, new LoanAcc());
    console.log(objCustomer.accountType.accountType + ' Account with interest rate of ' + objCustomer.accountType.calculateInterest('Loan'));


    var objCustomer: Customer = new Customer(1001, new SavingsAcc());
    console.log(objCustomer.accountType.accountType + ' Account with interest rate of ' + objCustomer.accountType.calculateInterest('Savings'));
}
Output
Loan Account with interest of 12
Savings Account with interest of 5
We have the same code of Accounts.ts with slight modification on window.load. We try to access a property specific to class implementing interface.
In the below code minimumBalance is a property specific to savingsAccount which implements Accounts. In such case we need to do type case from generic interface object to specific class object
so the property specific to class is available.
window.onload = function () {
    var objCustomer: Customer = new Customer(1001, new SavingsAcc());
    var objSavingAcc: SavingsAcc = <SavingsAcc>objCustomer.accountType;
    console.log(objCustomer.accountType.accountType + ' Account with interest rate of ' + objCustomer.accountType.calculateInterest('Savings') + ' with minimum balance of ' + objSavingAcc.minimumBalance);
}
Output
Savings Account with interest rate of 5 with minimum balance of 10000
One of the advantage of interface is while passing multiple arguments to constructor we can avoid the misplacement of the argument passed
like the one in code below. This is similar to ENUM in Java. The the Account class constructor we can change the arguments to interface as follows
Interfaces.ts
interface IPerson {
    name: string;
    age: number;
    location: string;
}

interface IEmployee extends IPerson{
    empId: number;
}

interface ICustomer extends IPerson {
    custId: number;
    accType: string;
}
Account.ts
class Account {
    private _name: string;
    private _age: number;
    private _location: string;
    private _custId: number;
    private _accType: string;

    constructor(name: string, age: number, location: string, custId: number, accType: string) {
        this._name = name;
        this._age = age;
        this._location = location;
        this._custId = custId;
        this._accType = accType;
    }
}
Refactored Account class with constructor arguments changed to inteface
Account.ts
class Account {
    private _name: string;
    private _age: number;
    private _location: string;
    private _custId: number;
    private _accType: string;

    constructor(iPerson: ICustomer) {
        this._name = iPerson.name;
        this._age = iPerson.age;
        this._location = iPerson.location;
        this._custId = iPerson.custId;
        this._accType = iPerson.accType;
    }
}