- CSRF Refers to Cross Site Request Forgery. More on CSRF Here
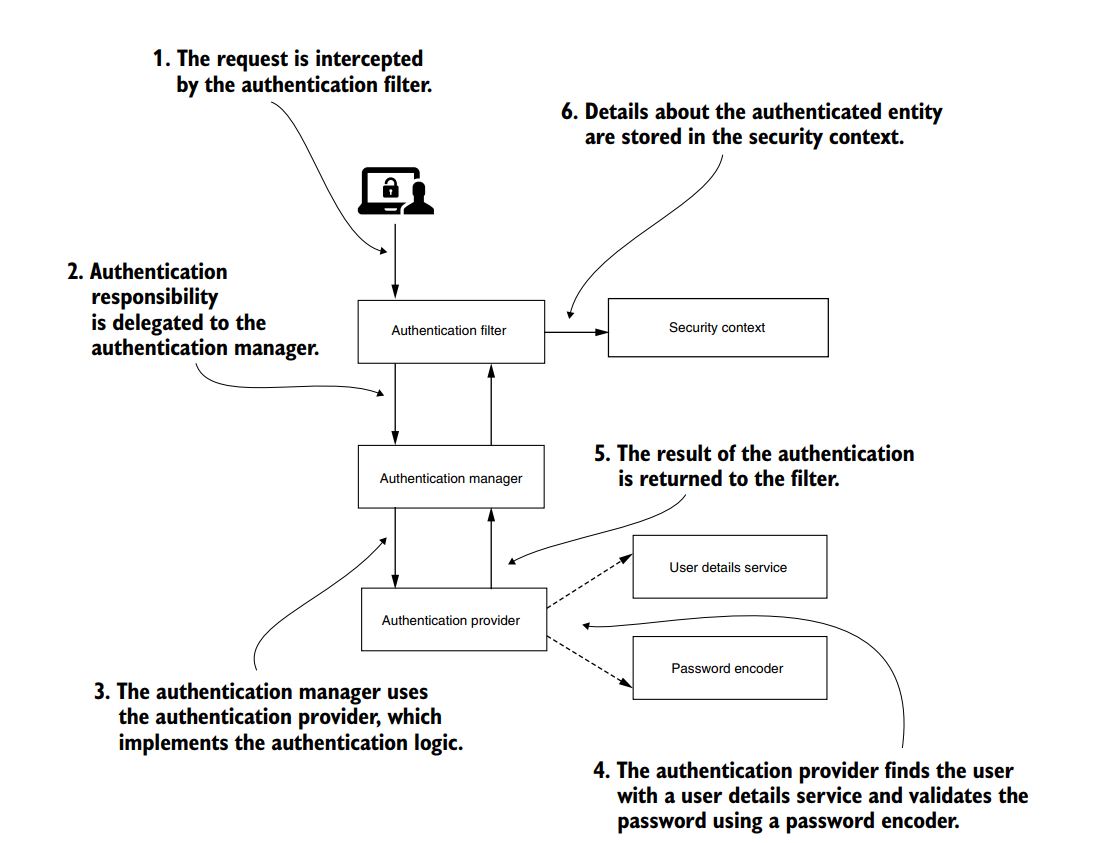
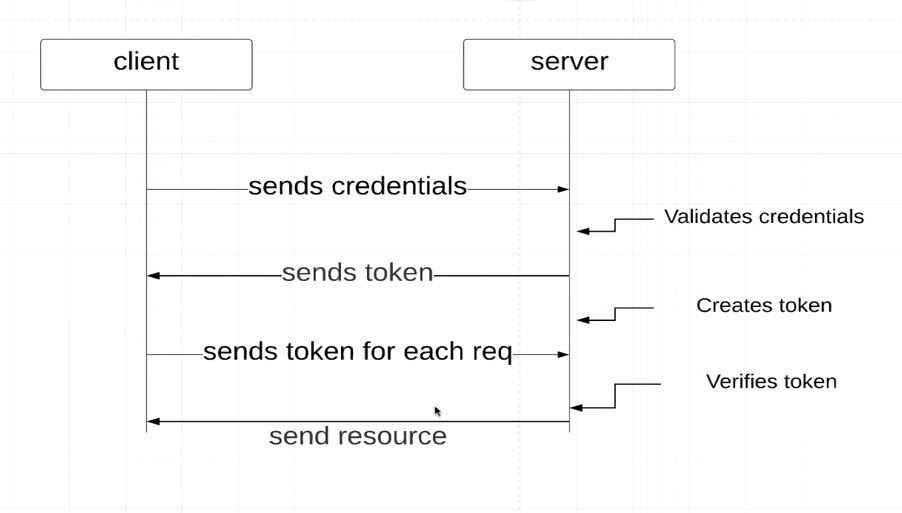
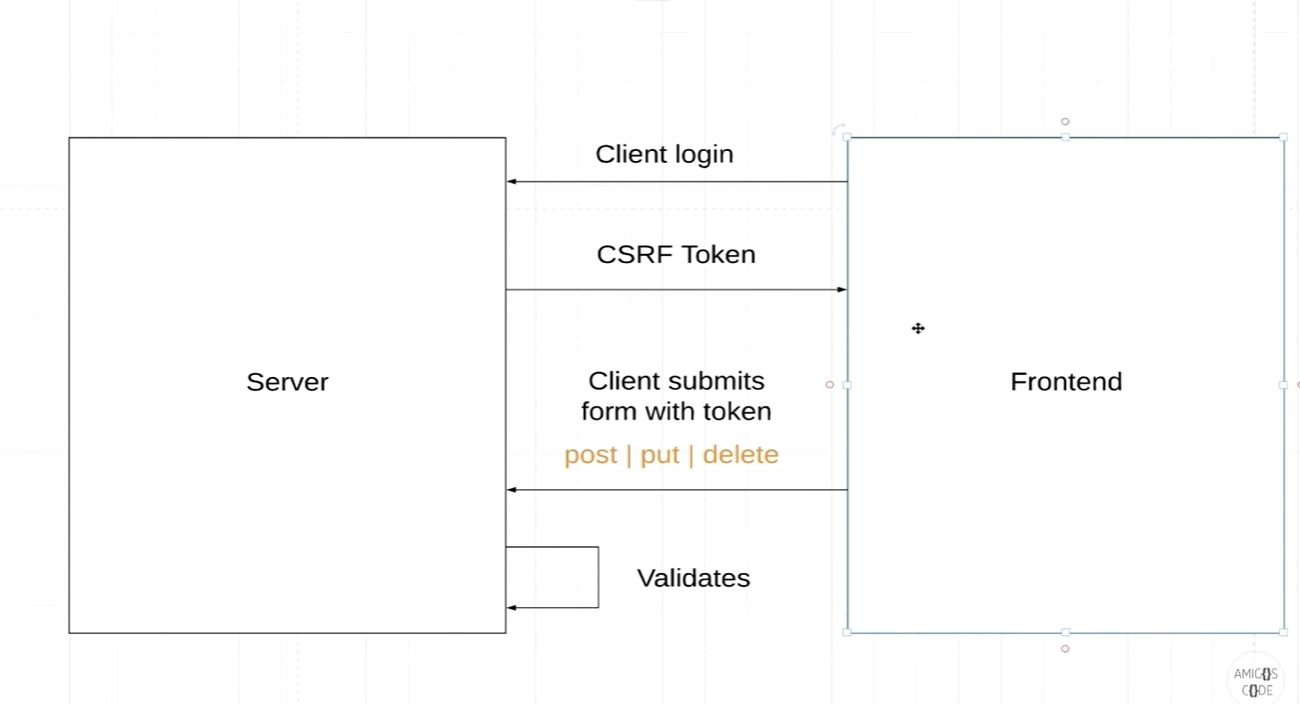
- When the Client makes the first GET request to the Server, Server generates CSRF token and sends back to Client
- On the Subsequent PUT,POST and DELETE request from the Client this token would be used for Authentication
- In Postman for the Same reason GET request would work irrespect we disable the CSRF in protected void configure(HttpSecurity httpSecurity) method. But for the PUT,POST and DELETE we should disable the CSRF as below otherwise the server would expect CSRF token when the request to server is PUT,POST and DELETE.
@Override
protected void configure(HttpSecurity httpSecurity) throws Exception
{

httpSecurity.csrf().disable()
            .authorizeRequests()
            .antMatchers("/", "index", "/css/*", "/js/*").permitAll()
            .
            .
Using CSRF Token for Authorization
- We have set of API’s exposed to the users whose role is ADMIN
- The way CSRF works is first Token would be generated once the User Logins using UserID and Password. The Way it works in REST API is first time
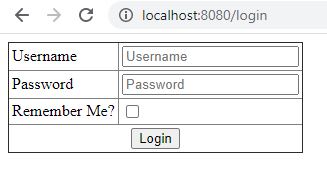
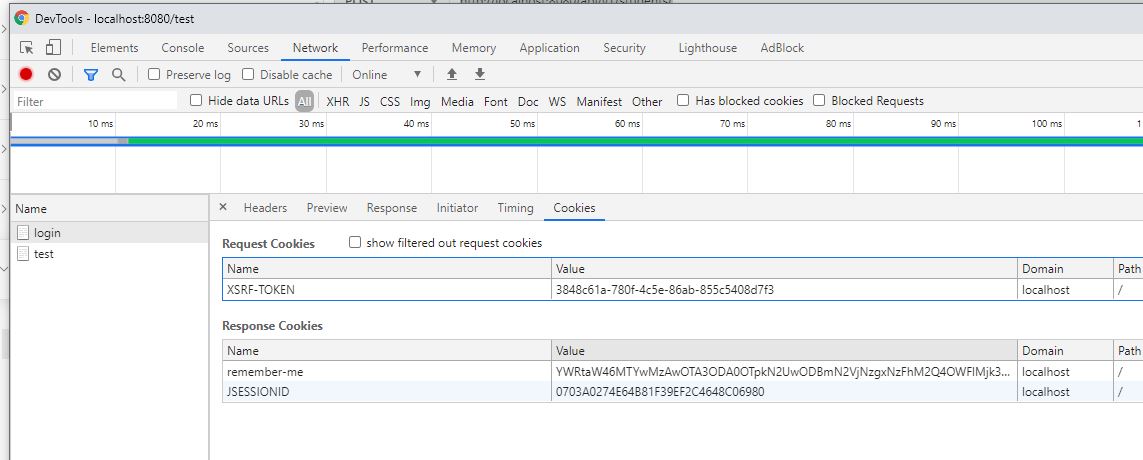
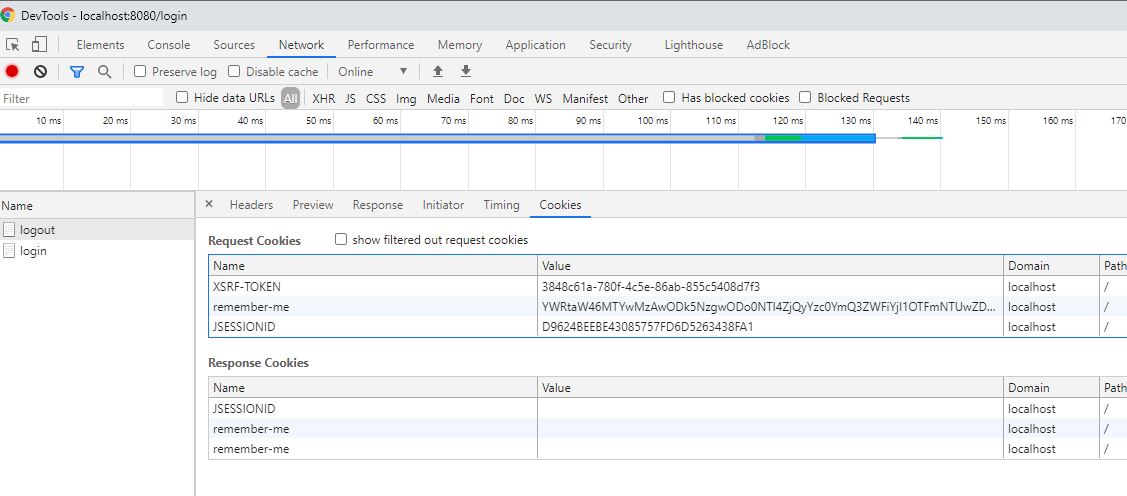
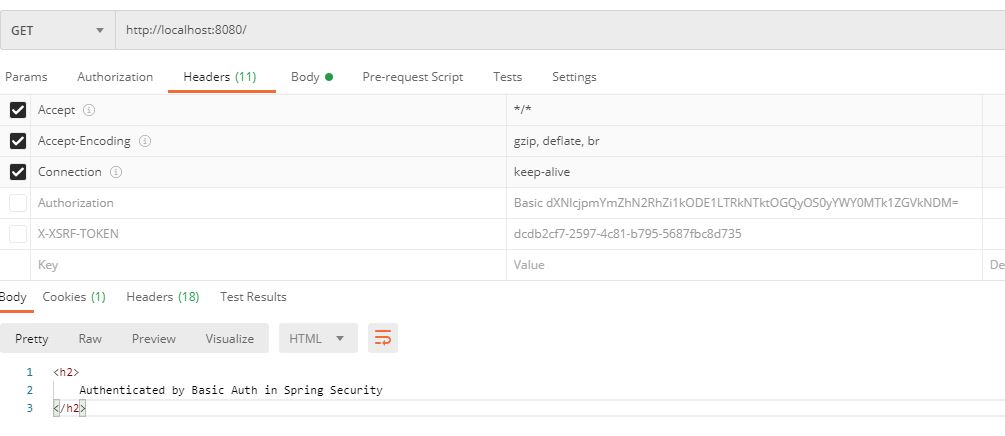
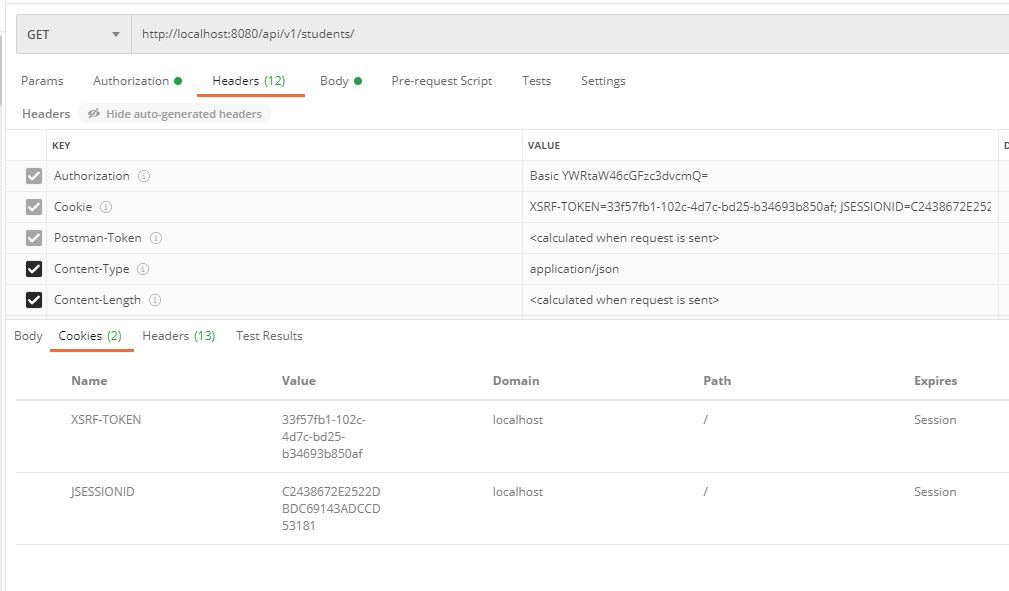
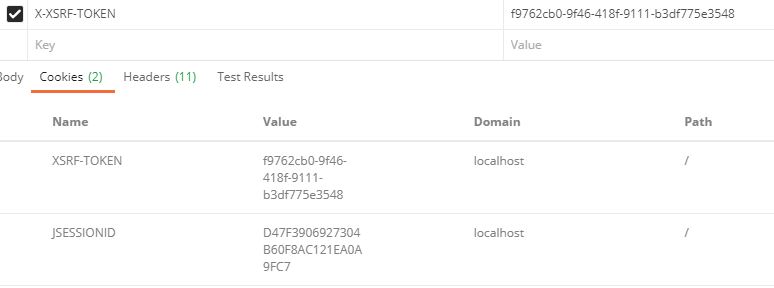
when you use GET method you should use Basic Auth in Authorization to Generate XSRF-TOKEN which would be set in Cookie along with JSessionID and also available in Response Headers - By default CSRF is not applicable for GET unless it is pointed to resource API. Simple reason behind that is, when the user types URL of login thats the first page which take login. If you try to access http://localhost:8080/ in postman it works fine without CSRF but when you access http://localhost:8080/api/v1/students/ which again uses GET method but points to resource API then it asks for UserId and Password due to basic Auth
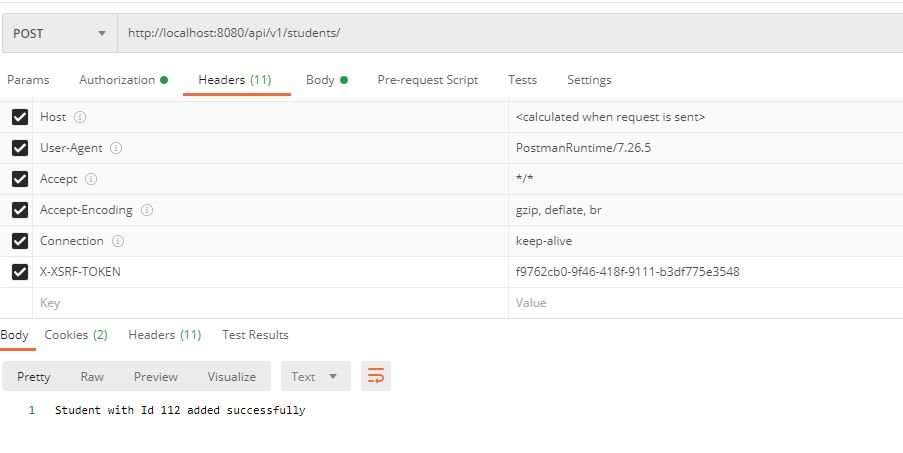
- Subsequent POST, PUT and DELETE request could be done by attaching X-XSRF-TOKEN to header. The Cookie which has the JSESSIONID and XSRF-TOKEN should not be deleted in Postman
- Though CSRF is enabled explicity in my Code it didnt worked until i added following lines in ApplicationSecurityConfig.java
.
.
        httpSecurity
                     .csrf()
                     .csrfTokenRepository(CookieCsrfTokenRepository.withHttpOnlyFalse())
.
Accessing resource using GET (No Authentication or Authorization)
Accessing resource using GET (Authentication needed for API Resource)
Accessing resource using POST (X-XSRF-TOKEN) in request header
XSRF-TOKEN received after GET with credentials and X-XSRF-TOKEN in haeder for sunsequent POST,PUT and DELETE calls
ApplicationSecurityConfig.java
Using CSRF Token for Authorization
@Override
    protected void configure(HttpSecurity httpSecurity) throws Exception{
        httpSecurity
                     .csrf()
                     .csrfTokenRepository(CookieCsrfTokenRepository.withHttpOnlyFalse())
                     .and()
                    .authorizeRequests()
                    .antMatchers("/", "index", "/css/*", "/js/*").permitAll()
                    .antMatchers("/api/**").hasRole("ADMIN")
                    .anyRequest()
                    .authenticated()
                    .and()
                    .httpBasic();
}
FAQ
There are N number of possibilities. Try out in Postman.
- How GET method to API resource Works with out CSRF token?
It works based on JSESSIONID. When the JSESSIONID in cookie is deleted then again it asks for Login and password - What happens when I delete XSRF token in Cookie?
New Token would be generated based on JSESSIONID in cookie - What happens when I delete XSRF token and in Cookie and try POST, DELETE and PUT over API?
New JSESSIONID would be generated and placed in cookie. For this X-XSRF-TOKEN should be passed in header.