To pass data between components at the same level under parent, I.E. passing data between two children within the same parent we use @Input and @Output and pass the value through the tags.
The Other option is using EventEmitter as variable in Service and emitting value from component1 and getting value in component2.
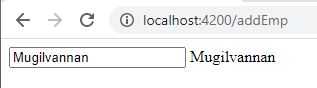
- In the below code we are passing data from list-person.component.ts to add-person.component.ts
- We are calling instance of personcrudService to call a function which emits event which is received by ListPersonComponent OnInit() method
- In add-person.component.ts we subscribe to the event by using instance of personcrudService
personcrud.service.ts
import {EventEmitter, Injectable, OnInit} from '@angular/core';
import {LoggingServiceService} from './logging-service.service';

@Injectable({
  providedIn: 'root'
})
export class PersoncrudService{
  statusUpdated: EventEmitter<string> = new EventEmitter<string>();

  constructor(public loggingServiceService: LoggingServiceService) {}

  updatePerson(id: number, status: boolean){
    .
    .
    this.statusUpdated.emit(this.arrPersons[id].name);
    .
    .
  }
}
list-person.component.ts
@Component({
  selector: 'app-list-person',
  templateUrl: './list-person.component.html',
  styleUrls: ['./list-person.component.css'],
  providers: [LoggingServiceService]
})
export class ListPersonComponent implements OnInit {
  constructor(private personcrudService: PersoncrudService,
              private loggingServiceService: LoggingServiceService) { }

  ngOnInit(): void {
  }

  updateStatus(i, status){
    this.personcrudService.updatePerson(i, status);
    this.loggingServiceService.logStatusOfPerson(status);
  }
}
add-person.component.ts
@Component({
  selector: 'app-add-person',
  templateUrl: './add-person.component.html',
  styleUrls: ['./add-person.component.css']
})
export class AddPersonComponent implements OnInit {
  constructor(private personcrudService: PersoncrudService) {
  }

  ngOnInit(): void {
    this.personcrudService.statusUpdated.subscribe(
      (name: string) => alert(name + ' has been updates')
    );
  }
}
![\[1<arr[i]<10^9\]](https://codethataint.com/blog/wp-content/ql-cache/quicklatex.com-83c987b36d9aa35ebe4b8959adb7e0d7_l3.png "Rendered by QuickLaTeX.com")
![\[1<candles[i]<10^7\]](https://codethataint.com/blog/wp-content/ql-cache/quicklatex.com-272ea8f947d07ad873b85cc10ac2a88d_l3.png "Rendered by QuickLaTeX.com")