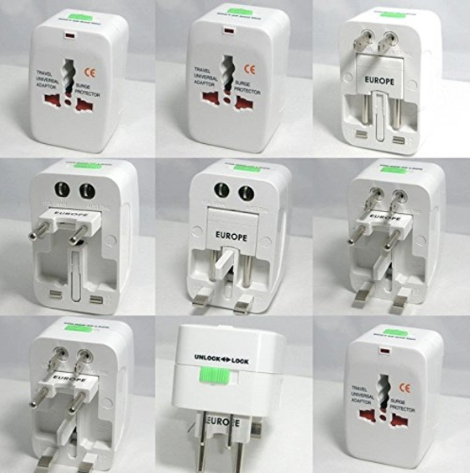
Adapter Pattern help in changing the third party integration without making much changes to the Core code.
Three main components:
Target: This is the interface that the client expects to use.
Adaptee: This is the existing interface that needs to be adapted to work with the client.
Adapter: This is the class that adapts the Adaptee to the Target interface.

Why to use Adapter Pattern?
- It Allows Incompatible interfaces between classes to work together without modifying their source code.
- It acts as a bridge between two interfaces, making them compatible so that they can collaborate and interact seamlessly.
- This pattern is useful when integrating existing or third-party code into an application without modifying the existing codebase.
When to use Adapter Pattern?
You can use the Adapter design pattern when you have to deal with different interfaces with similar behavior (which usually means classes with similar behavior but with different methods).
- Legacy code integration: When we need to integrate legacy code into a new system
- Data format conversion: When we receive data from a third-party system, we may find that the data is in a format that is incompatible with our system.
- Third-party library integration: When we use a third-party library in our code, we may find that the library uses an interface that is incompatible with our code.
How to implement Adapter Pattern?
In your code instead of hard coding the method calls of each vendor (or Adaptee), you could then create a generic interface to wrap these similar behaviors and work with only one type of object. The Adapters will then implement the Target interface delegating its method calls to the Adaptees that are passed to the Adapters via constructor.
Code Example:
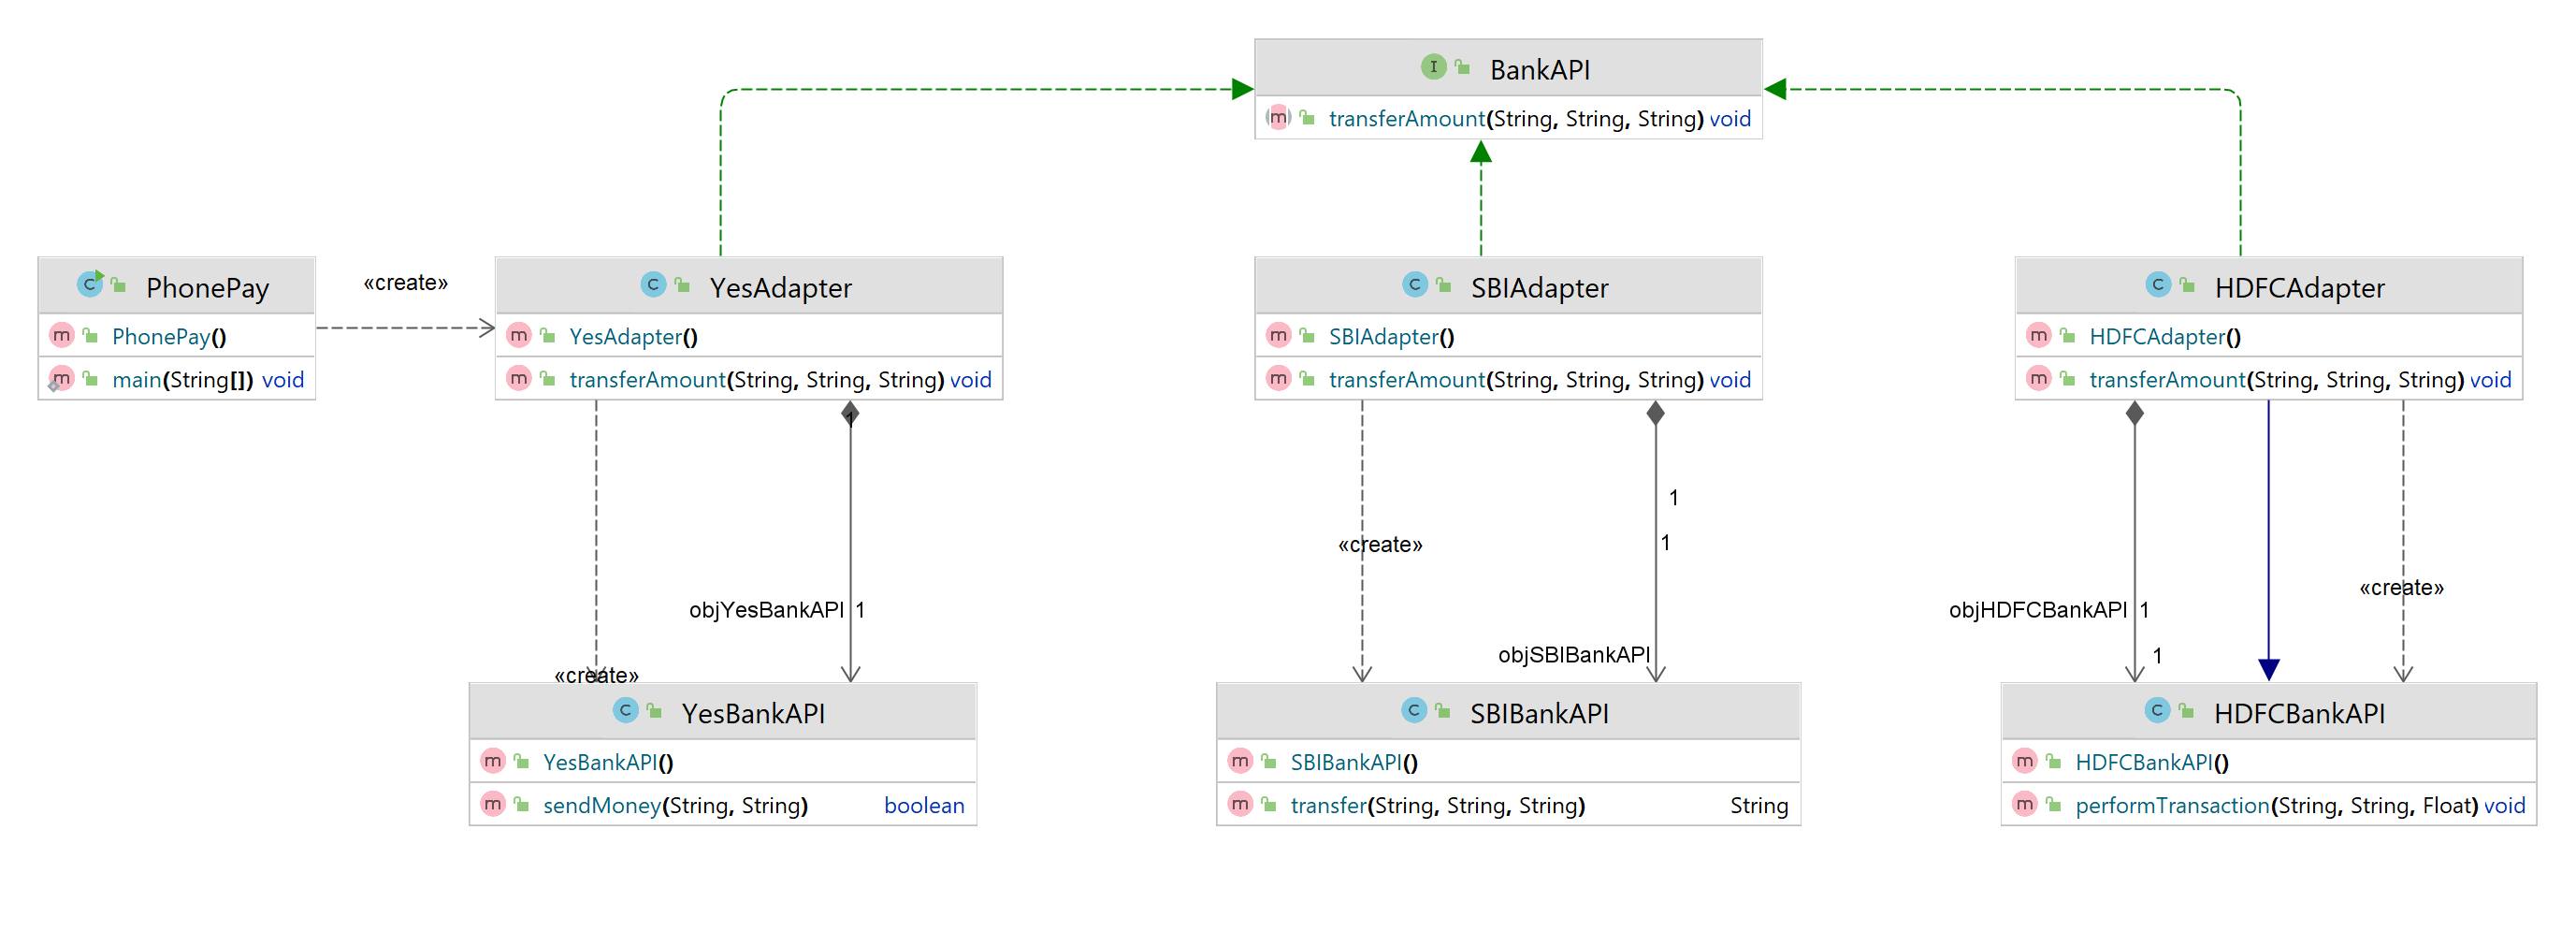
- Below we have PhonePay implementing BankAPI methods
- If Phonepay directly tries to use the classes of hdfcAPI or Any other bank api the code would become tightly coupled and would become difficult to change
- To get rid of tight coupling what we do in adaptor is we override the methods in the BankAPI and in method definition we call respective banks which the phone pay application has tie ups
- In case there is a need tomorrow for the phonepay application to change the Bank Gateway the only place to change is where the Adapter is called.
- The transferAmount of the bank API interface is overridden in the corresponding adapter classes and the definition is changed based on the way the corresponding way Bank APIs are getting called

Target : BankAPI
Adapters : HDFCAdapter, YesAdapter, SBIAdapter
Adaptees : HDFCBankAPI, YesBankAPI, SBIBankAPI
Client : PhonePay
BankAPI.java
public interface BankAPI {
    public void transferAmount(String fromAcc, String toAcc, String amount);
}
HDFCAdapter.java
public class HDFCAdapter implements BankAPI {
    HDFCBankAPI objHDFCBankAPI = new HDFCBankAPI();

    @Override
    public void transferAmount(String fromAcc, String toAcc, String amount) {
        objHDFCBankAPI.performTransaction(fromAcc, toAcc, Float.valueOf(amount));
    }
}
HDFCBankAPI.java
public class HDFCBankAPI {
    public void performTransaction(String creditorAcc, String debitorAcc, Float Amount){
        System.out.println("Transfering Funds");
    }
}
YesAdapter.java
public class YesAdapter implements BankAPI {
    YesBankAPI objYesBankAPI = new YesBankAPI();

    @Override
    public void transferAmount(String fromAcc, String toAcc, String amount) {
        objYesBankAPI.sendMoney(fromAcc, toAcc);
    }
}
YesBankAPI.java
public class YesBankAPI {
    public boolean sendMoney(String creditAcc, String debitAcc){
        System.out.println("Transaction Steps.....");
        return true;
    }
}
SBIAdapter.java
public class SBIAdapter implements BankAPI {
    SBIBankAPI objSBIBankAPI = new SBIBankAPI();

    @Override
    public void transferAmount(String fromAcc, String toAcc, String amount) {
        objSBIBankAPI.transfer(fromAcc, toAcc, amount);
    }
}
SBIBankAPI.java
public class SBIBankAPI {
    public String transfer(String account1, String account2, String Amount){
        System.out.println("Transaction from Account1 to Account2");
        return "Transaction Successful";
    }
}
PhonePay.java
public class PhonePay {
    public static void main(String[] args) {
        //Incase you want to change the Bank Gateway tomorrow you can change the Adapter Alone
        BankAPI objBankAPI = new YesAdapter();
        objBankAPI.transferAmount("AccNo 154264", "AccNo 4264755", "452");
    }
}