1. Till now we were sending requests over HTTP. Now lets make HTTP secured using https by installing certificate in our project
  2. To generate certificate we use Key Store Explorer and will generate PKCS#12 Certificate
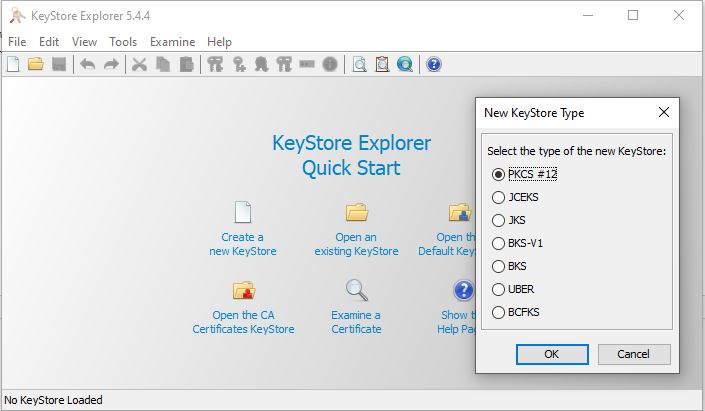
  3. Generate a public and private key and save the keystore
  4. The Keystore should be copied to the resources folder and the credentials of the keystore should be added to application.properties as below.

    application.properties

    # The format used for the keystore. It could be set to JKS in case it is a JKS file
    server.ssl.key-store-type=PKCS12
    # The path to the keystore containing the certificate
    server.ssl.key-store=classpath:TestCert
    # The password used to generate the certificate
    server.ssl.key-store-password=password
    
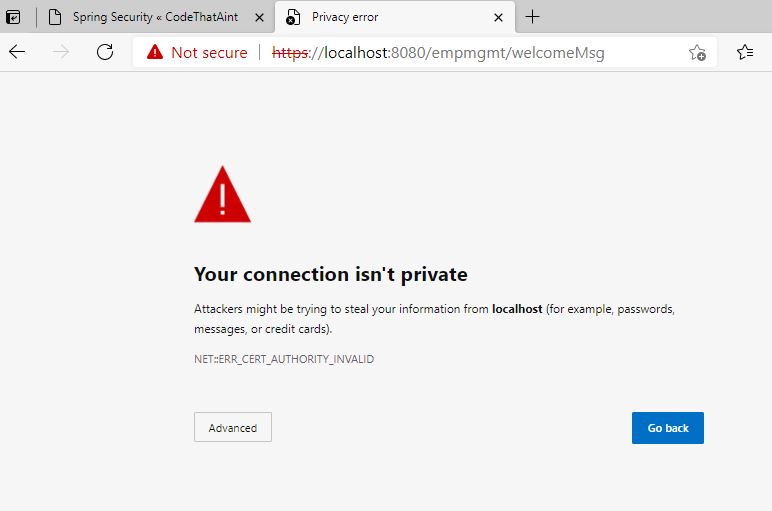
  5. Since the certificare generated(keystore file) cannot be cross checked with CA(Certificate Authority) it would display message like one below for the authenticy of certificate, whether it should be accpeted or not. How ever you can continue further by clicking on advanced
Note: While performing CRUD the addition of user is a JSON request which should be carried out only from postman. For this enable interceptor plugin in Chrome so that cookies set in chrome would be available in Postman.

Further Reads:
How SSL Works
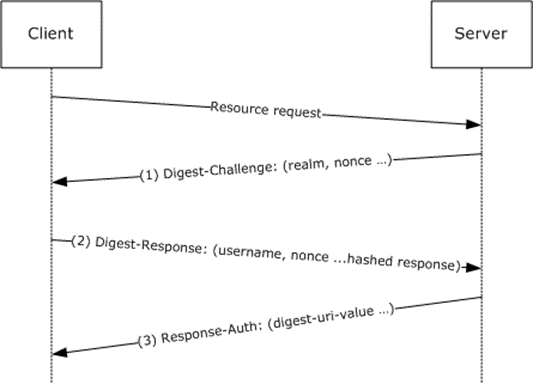
The server gives the client a one-time-use number (a nonce) that it combines with the username, realm, password, and URI request. The client runs all of those fields through an MD5 hashing method to produce a hash key.

It sends this hash key to the server along with the username and the realm to attempt to authenticate.
Server-side the same method is used to generate a hash key, only instead of using the password typed into the browser, the server looks up the expected password for the user from its user DB. It looks up the stored password for this username, runs in through the same algorithm, and compares it to what the client sent. If they match then access is granted, otherwise, it can send back a 401 Unauthorized (no login or failed login) or a 403 Forbidden (access denied).

Steps

  1. Client makes request
  2. Client gets back a nonce from the server and a 401 authentication request
  3. Client sends back the following response array
     (username, realm, generate_md5_key(nonce, username, realm, URI, password_given_by_user_to_browser)) 
    
  4. The server takes username and realm (plus it knows the URI the client is requesting) and it looks up the password for that username in DB. Then it goes and does its own version of
     generate_md5_key(nonce, username, realm, URI, password_I_have_for_this_user_in_my_db)
    
  5. It compares the output of generate_md5() that it got with the one the client sent, if they match the client sent the correct password. If they don’t match the password sent was wrong.

It doesn’t require sending the username and password across the wire in plaintext. It is also immune to replay-attacks, as it uses a one-time number from the server.

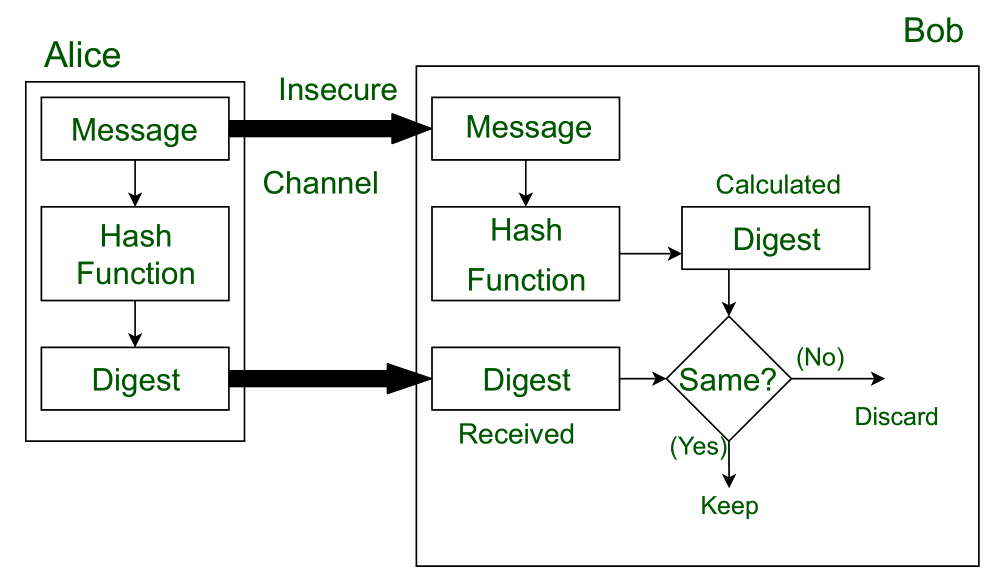
Lets assume, Alice sent a message and digest pair to Bob. To check the integrity of the message Bob runs the cryptographic hash function on the received message and gets a new digest. Now, Bob will compare the new digest and the digest sent by Alice. If, both are same then Bob is sure that the original message is not changed.

Step by Step Action

  1. client sends a request for an access-protected resource, but an acceptable Authorization header field is not sent
  2. server responds with a “401 Unauthorized” status code and a WWW-Authenticate header field (the digest-challenge)
  3. client sends another request for the same resource but containing a Authorization header field in response to the challenge (the digest-response)
  4. if the authorization is not successful, go to step 2; otherwise the server proceeds as normal.